Coving & Cornice Fitting Guide
Guidelines and Tips for Installing Plaster Coving
We offer a coving installation service covering most of the UK. We have a network of recommended coving installers, who can provide an expert reasonably priced coving fitting service. Alternatively below we set out a series of guidelines and tips for DIY coving installation
Below, you will find the information regarding our delivery fees & times:
Materials and Coving Tools for the Job
Plaster Coving - it is always better to use one large piece of coving rather than two shorter pieces whenever possible because the end result will be much neater and aesthetically pleasing.
Please note - Plaster Coving is fragile; we recommend that you have 15-20% excess metreage on site in the event of any breakages during fitting.
List of Materials and Tools
- Safe working platform
- Small tool and busks
- Buckets and bowls
- Paint brush and sponge for smoothing filler and dampening the cornice
- Fine or Medium toothed cross-cut wood saw
- Hammer and small nails or drill driver and screws
- Spirit Level
- Mitre Box (optional - see videos on cutting an internal & external mitres)
- Pencil
- PVA Bonding Agent (optional)
- Coving Adhesive (see video - How to mix adhesive)
Stage 1: Marketing the Position of the Coving
The height of a ceiling can vary within a room so do not be tempted to use it as a benchmark guide for fitting your plaster coving.
Your first task is to identify ceiling height variation, to ensure that the finished coving will be level throughout the room.
- Cut a small piece of coving around 12 inches long to use as a guide.
- Offer this piece of coving up to the wall and ceiling.
- With a pencil, mark a line where the edges of the coving meet the ceiling and the wall and work your way around the room marking the wall and the ceiling at suitable intervals.
- With a straight edge or chalk line, join up the marks giving you a line around the edge of the ceiling and a line around the top of the wall.
If the line on the wall is not level then importantly you have identified areas where the height of the ceiling varies.
To compensate for the anomalies in ceiling height that you find you next need to mark on the wall a level line from the lowest point found and extend this new line around the room around the room at the same level.
It is always better to fill a gap between the top of the coving and the ceiling, as this will result in a more professional finish.
Remember never try to follow the contours of an uneven ceiling with your coving.
Stage 2: Preparation of the Wall/Ceiling Surfaces
To ensure that your coving adhesive bonds securely to the wall, ceiling and coving surfaces:
- Remove any wallpaper that lies between the lines drawn in STAGE ONE.
- Scrape any paint off.
- With a sharp knife or scraper score the wall in a crisscross pattern, this will allow the coving adhesive to get a firm key with the wall.
- Cover the hatched surface with the bonding agent (diluted to manufacturers recommendation) and allow to dry.
Alternatively if you want to skip this preparation stage you can countersink srews into the cornice which will secure the cornice while the adhesive sets (see How to install plaster coving video, for a demonstration of this method) You have completed the preparatory work.
Stage 3: Fixing the Plaster Coving Into Position
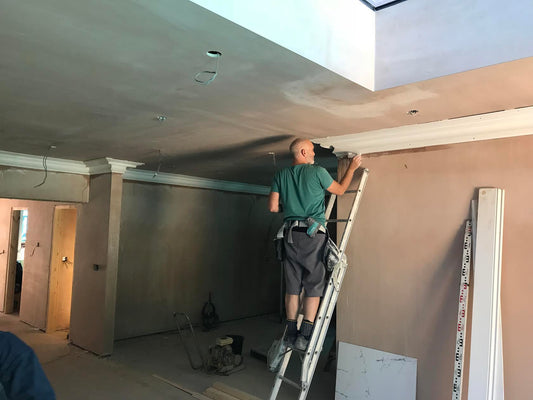
Plaster coving is fragile and can snap under its own weight if not handled properly; if you have not handled coving before then you will find it easier to have someone to help you, especially when handling larger pieces of coving
The best place to begin fixing your coving is in the first corner that you see when you come into the room (beginning in any external corners such as a chimney breast if applicable).
This area will be the most noticeable section of coving when you have completed the job and it is easier to get this first corner right so you should start to fix your coving from here.
We recommend that you always use the longest pieces of coving that are practically possible, to avoid unnecessary joints; the fewer the joints the neater the overall finish, and is worth having some off cuts left over at the end to get the best finish.
If you have not fitted coving before it is quite easy to cut the wrong angle; to avoid this potential problem, it is worth practising cutting the angles on a piece of scrap/waste coving and then in pencil, mark the true angle of the cut and the approximate position on the pieces of coving you are proposing to fit in advance of actually cutting the coving.
It is easy to cut an internal rather than an external angle until you get used to it. (See videos of how to cut an internal & external mitre for a demonstration without the use of a mitrebox).
Alternatively use an adjustable mitre box to cut your angles.
When you make this/set it up, make sure that the other end of your length of coving is supported at the same height as the coving in the mitre box, so it lies perfectly straight and level.
Use a fine or medium toothed cross-cut wood saw for cutting coving (the stiffer the blade the better to ensure a straighter cut).
Once you have cut the coving for your first corner, offer the pieces up to the wall to check the join, (it is unlikely your walls will be exactly 90 degrees so you will have to fill any gaps at the joint.
(Watch video of how to fill a mitre). Cover the edges of the coving with bonding agent and allow to dry.
Before you begin to prepare the adhesive, first tap in some small nails along the wall drawn pencil positional guideline (produced in STAGE ONE) which will serve to support the weight of the coving while you fit it and to also hold the coving in position while it dries (if you choose not to screw the cornice in place).
For larger coving and cornice, you can also put some pins into the ceiling to stop the coving pulling away from the ceiling under its own weight, before the coving adhesive dries.
Now prepare the adhesive (if you are mixing your own adhesive, be sure to use a clean bucket and clean water).
Spread the coving adhesive along the back of the coving at the top and the bottom, where it will be in contact with the wall and ceiling.
Now push the coving firmly into position checking that the foot of the coving is butting up to the nails applied along the pencil positional guideline drawn on the wall.
Use a pallet knife to scrape off the excess coving adhesive from the top and bottom of the coving and finally, with a wet sponge, wipe over the joint.
Remove the nails after 2 or 3 hours and fill the holes; casting plaster preferably or coving adhesive if neccessary can be used to fill all the joints.
Finally to finish your coving we recommend painting with two coats of matt emulsion watering down the first coat.
Alternatively we can also offer a coving installation service covering most of the country.
We have a network of recommended coving installers, who can provide an expert reasonably priced coving fitting service.
We specialize in fitting coving in London and the South East where we have many customers. Watch our video, Planning your coving job.
-
Need help?
View articles and videos designed to help you make the right choices when purchasing and installing products from Plaster Ceiling Roses.
-
Help Guides