How to Install Plaster Coving
Plaster coving can make such a difference to a room, bringing character, beautiful detail and a smooth transition between your walls and ceiling. Getting that lovely finish starts with a little planning - and we're here to walk you through it.
In this guide, we cover everything from preparing your surfaces and cutting corners to securing your cornice and getting it ready for painting.
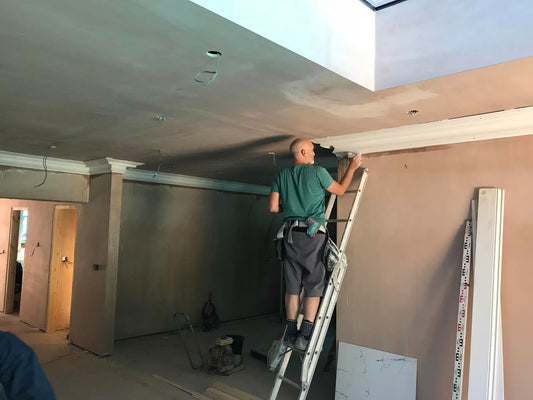
Alongside the steps below, professional coving installer, Mark Draper demonstrates the fitting process in our video.
Before you begin:
Our coving and cornice are supplied in raw plaster, so filling, smoothing and painting are all part of the installation process. Small chips and minor surface imperfections can be finished during fitting to create the appearance you see in our inspiration photographs on our product pages, all images are sent from our customers once the coving is installed and finished.
Plaster coving is also fragile before installation. Keep lengths supported when handling and cutting them, and have someone help you lift them into position, particularly with larger profiles.
Measure your room carefully and plan where your corners and joins will fall. We recommend allowing 15-20% extra metreage to cover cuts, waste and possible breakages.
Tools and materials you'll need:
- Safe working platform
- Buckets and bowls
- Small Tool
- Coving Adhesive
- Coving/Cornice
-
Casting Plaster
- Paint brush and sponge
- Spirit level
- Mitre box (optional - see videos on cutting internal and external mitres)
- PVA Bonding Agent (optional)
- Drill, appropriate screws, hammer and fixings where required.
Step 1: Measure and mark the position
Take your time with this stage - it gives you a reliable guide for the whole room.
First, check which way up your chosen profile should sit. Use a short offcut as a template, holding it against the wall and ceiling in its intended position. Mark where its lower edge meets the wall and its upper edge meets the ceiling, repeating at intervals around the room.
Check your marks with a level before joining them up. Ceilings aren't always perfectly even, particularly in older homes.
If the line on the wall is not level then importantly you have identified areas where the height of the ceiling varies.
To compensate for the anomalies in ceiling height that you find you next need to mark on the wall a level line from the lowest point found and extend this new line around the room at the same level.
It is always better to fill a gap between the top of the coving and the ceiling, as this will result in a more professional finish.
Remember never try to follow the contours of an uneven ceiling with your coving.

A little extra care with your guidelines now makes positioning each length much easier later.
Step 2: Prepare the walls and ceiling
If you're applying to fresh plaster, allow it to fully dry and brush away any dust.
If you're fitting onto existing walls and ceilings:
- Remove any wallpaper.
- Scrape any paint off.
- With a sharp knife or scraper, score the wall in a criss-cross pattern, this will allow the coving adhesive to get a firm key with the wall.
- Cover the hatched surface with the bonding agent (diluted to manufacturer's recommendation) and allow to dry.
Step 3: Cut and check your corners
Plan your starting point and mark the direction of each cut in pencil. Internal corners turn into the room's corners, while external corners wrap around features such as chimney breasts.
Check whether each cut is an internal mitre or an external mitre, and mark its direction on the coving in pencil.
Use a fine, or medium toothed hand saw and a suitable mitre box if required. Support the full length of coving whilst cutting, keeping both ends at the same height.
Our video guides show you how to cut:
New to cutting mitres? Practise on an offcut first to get comfortable with the angles.
Before adding adhesive, hold the cut pieces in position to check the fit. Adjust where needed, and make sure any decorative pattern lines up neatly.
For decorative cornice, check how the pattern meets at corners and joins too.

Step 4: Apply adhesive and position the coving
Gently tidy any rough areas on the rear contact edges with a Surfom, as demonstrated in the video, taking care to preserve the profile. Brush away loose dust.
Mix your coving adhesive using clean tools and water, following the product instructions. Apply sufficient adhesive to the rear upper and lower contact areas where the coving meets the ceiling and wall.
Mix manageable amounts so you have time to position and clean each length before the adhesive begins to set.
Need a demonstration? Watch our guide to mixing coving adhesive.
With someone helping you support the length, lift into position and press gently into place. Check it against your guidelines along its full profile, keeping the profile straight.

Step 5: Secure each length and continue around the room
Support the coving while the adhesive sets. Larger, heavier cornice may also require suitable screws and fixings into a sound background. The fixing method and quantity should suit the profile and the wall or ceiling construction.
Check for concealed cables and pipes before drilling. Where screws are used, carefully recess the heads for filling and avoid overtightening.
Apply adhesive to adjoining ends before fitting the next piece, then bring the lengths together with the profile and pattern aligned.
Scrape away excess adhesive and gently clean with a damp brush or sponge as you go. Keep temporary supports in place until the adhesive has set sufficiently, following its instructions.
Step 6: Fill and smooth the details
Once the coving is secure and the adhesive has set, fill the mitres, joins, recessed screw heads and small fitting gaps with casting plaster, also known as Plaster of Paris.
Our coving is supplied in raw plaster, so filling minor chips and surface imperfections is a normal part of achieving the finished result.
Use a small tool to shape the repairs to match the surrounding profile, then smooth carefully with a lightly dampened brush. Allow everything to dry before gently sanding any areas that need it.

Keep decorative details crisp by filling and sanding only where needed.
Step 7: Prepare and paint
Allow the coving, adhesive and filled areas to dry fully before decorating. Brush away sanding dust, then apply a paint system suitable for bare plaster.
Follow your paint manufacturer’s instructions for priming, first-coat dilution where required, and finishing coats. Matt emulsion is a popular choice for a soft, classic finish.
Once painted, the filled joints and finishing touches should blend into the profile, leaving a beautifully finished transition between your walls and ceiling.
Ready to bring your room together?
With careful preparation and a little attention to detail, plaster coving creates a beautifully finished room that you can enjoy for years to come. We hope this guide and video have helped you feel confident about your next project!
Visit our delivery page for information on getting your coving to your door. If you need help choosing a profile, have a fitting question or would like details of recommended installers, contact our friendly team - we're happy to help get you started!
-
Need help?
View articles and videos designed to help you make the right choices when purchasing and installing products from Plaster Ceiling Roses.
-
Help Guides